New in KIP MediWeb 1.256 is a feature that makes it easy to change where the balance of an invoice is going to.
Watch this short video below to see how this works:
New in KIP MediWeb 1.256 is a feature that makes it easy to change where the balance of an invoice is going to.
Watch this short video below to see how this works:
How many times have you left a Post-It Note on somebody’s computer in your office? Wouldn’t it be nice to just message them instead?
Well now you can!
It’s especially helpful if you are using KIP from more than one location – either from home or at a second office location. You just message the person. And best of all, those messages are always available to review – you can never lose one.
In order for this to work right, you want to have a separate user log-in for every person who works in your office.
1. You need to sign into KIP as an administrator (that means the username will end in “admin”).
If you forgot how to do this, you need to have a Practice Owner contact us for help.
2. Go to View > Manage Users and set up a username and password for everyone in your office (including each doctor).
Doing this will give every person in your office their own log in username and password.
3. Now go to View > Employees and open up each employee. Where it says “KIP Username”, select the username that that employee uses to log into KIP.
Each doctor will need to be set up as an employee, too, so they can get messages.
That’s it!
Now that everyone has their own username, they will get their own private messages.
When you log into KIP, you will get a notification that you have a message. You will also notice on the KIP icon in the dock a little red number that indicates how many messages are waiting for you.
You view your messages by going to View > Messages.
If you click on Inbox in the left column, you will see all messages sent to you. If you click on the person’s name under the Inbox, you only see the messages from that one person.
If you click on Sent in the left column, you will see messages you sent. If you click on the person’s name under the Sent, you only see the messages you sent to that one person.
Messages are totally private and internal, just like all KIP data.
Click the Compose button to send a new message.
Pick who the message goes to, enter a subject and a message – then send. You must have something entered in all three areas to send a message.
If you see the Send button is dimmed, check to make sure you have entered a recipient, subject, and a message. You need all three to send a message.
Automate sending letters to your New Patients and send their chart notes to their Primary Care Physician. It’s easy using an automated letter.
Here’s how in four easy steps:
Step 1. Write an Automated Letter
Choose Automated Letters from the Lists menu and click the NEW button. Format the letter as you would using any word processor. Use the codes below to automatically enter patient data into the letter.
For example, enter <firstname> wherever you want the patient’s first name to appear.
Use this table below for the codes for other patient information:
| Insert this: | When you enter this: |
|---|---|
| Patient's First Name | <firstname> |
| Patient's Last Name | <lastname> |
| Patient's Street | <street> |
| Patient's City | <city> |
| Patient's State | <state> |
| Patient's Zip | <zip> |
| Patient's Birthdate | <birthdate> |
| Patient's Last Exam Date | <lastexam> |
| Patient's Preferred Doctor in your Practice | <doctor> |
| Today's date (long) | <longdate> |
| Today's date (short) | <shortdate> |
| Today's date (mm/dd/yy) | <date> |
| Current time | <time> |
| Patient's total balance | <totalbalance> |
| Patient balance | <ptbalance> |
| Referring doctor first name | <ref_firstname> |
| Referring doctor last name | <ref_lastname> |
| Referring doctor street | <ref_street> |
| Referring doctor city | <ref_city> |
| Referring doctor state | <ref_state> |
| Referring doctor zip | <ref_zip> |
Step 2. Select your Preferred New Patient Letter (or Doctor Letter) in the Preferences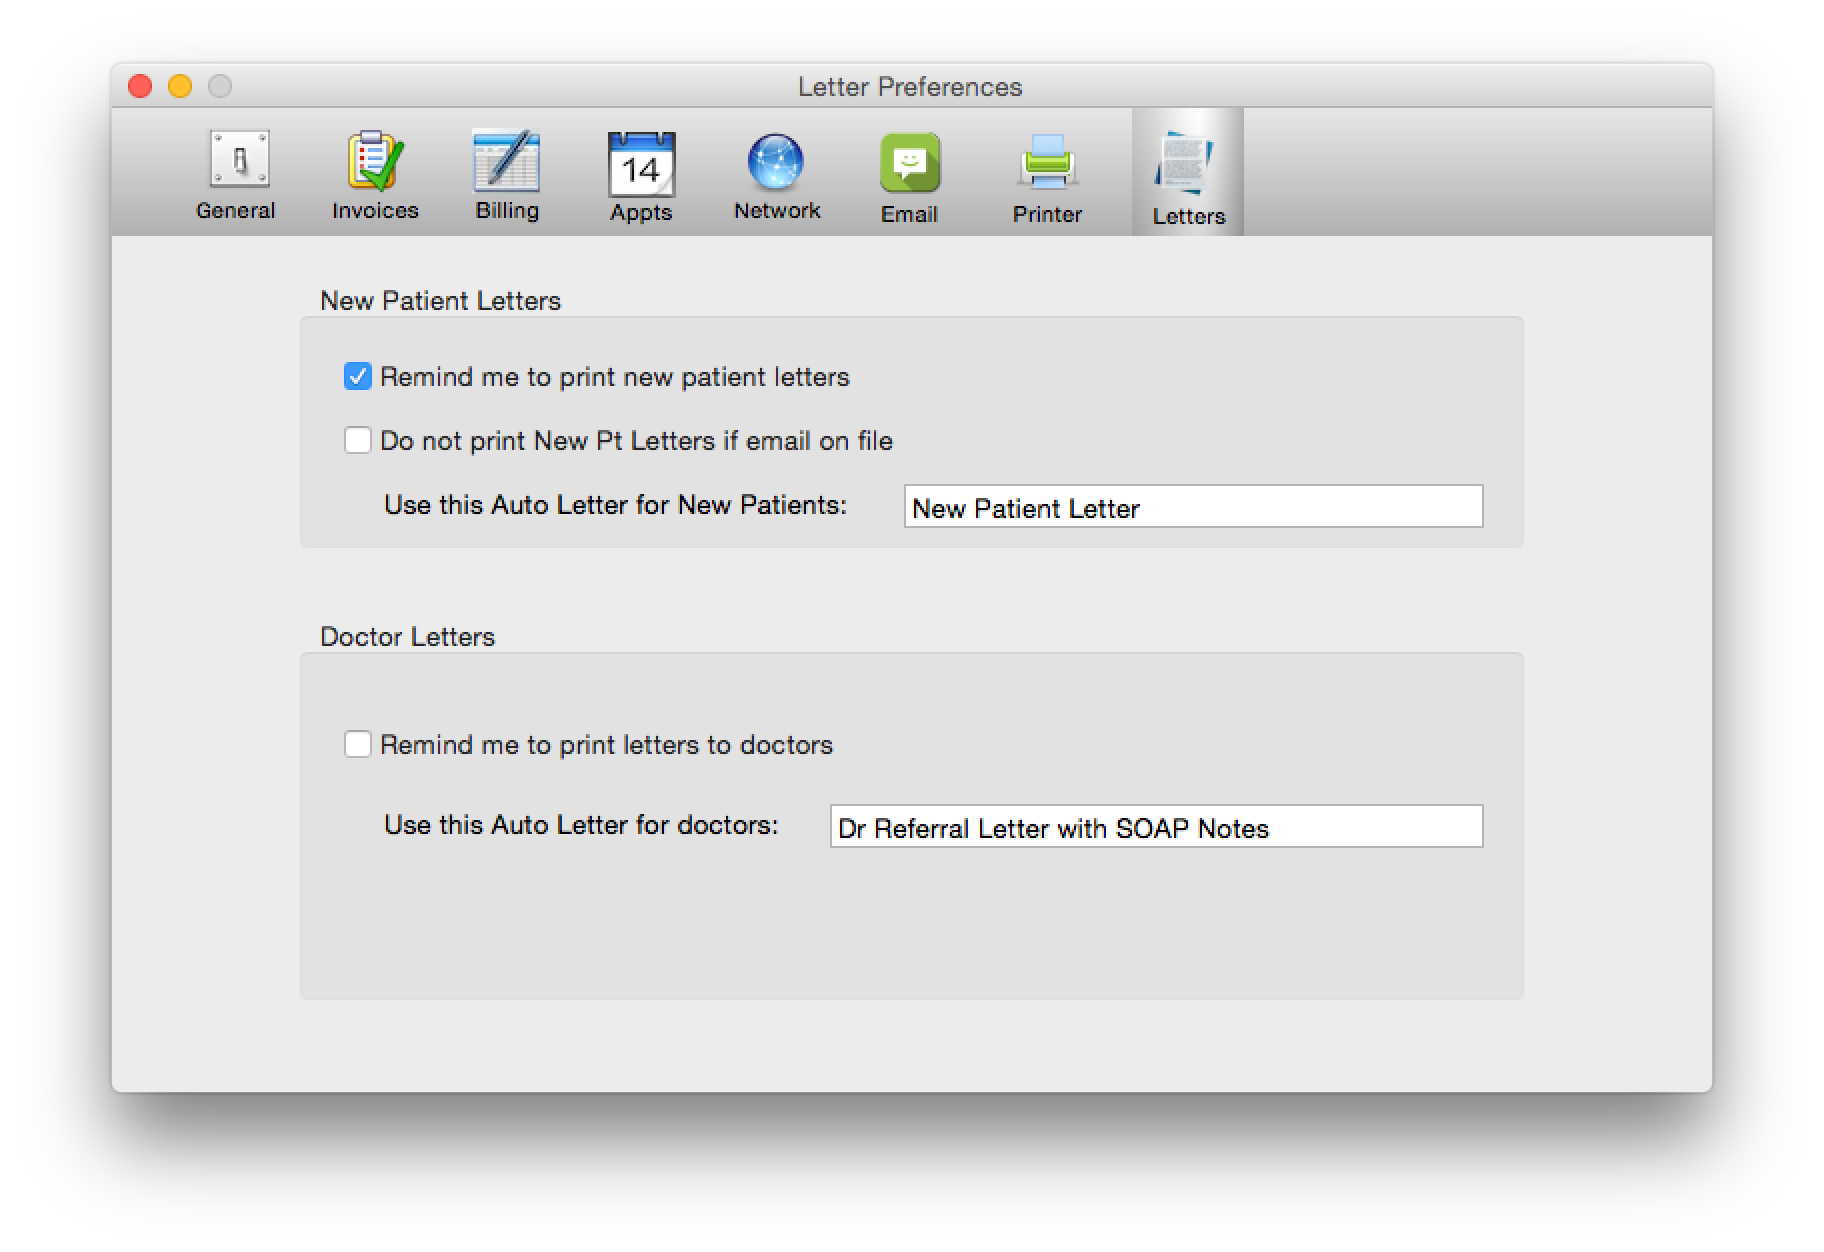
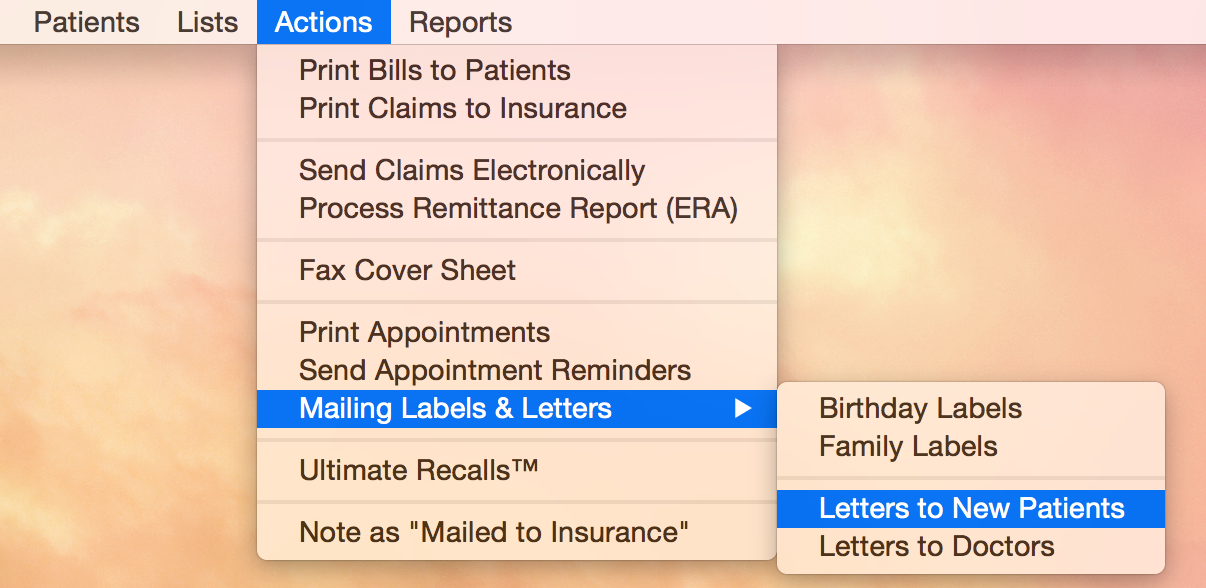
Step 3. Choose Print New Patient Letters from the Actions menu
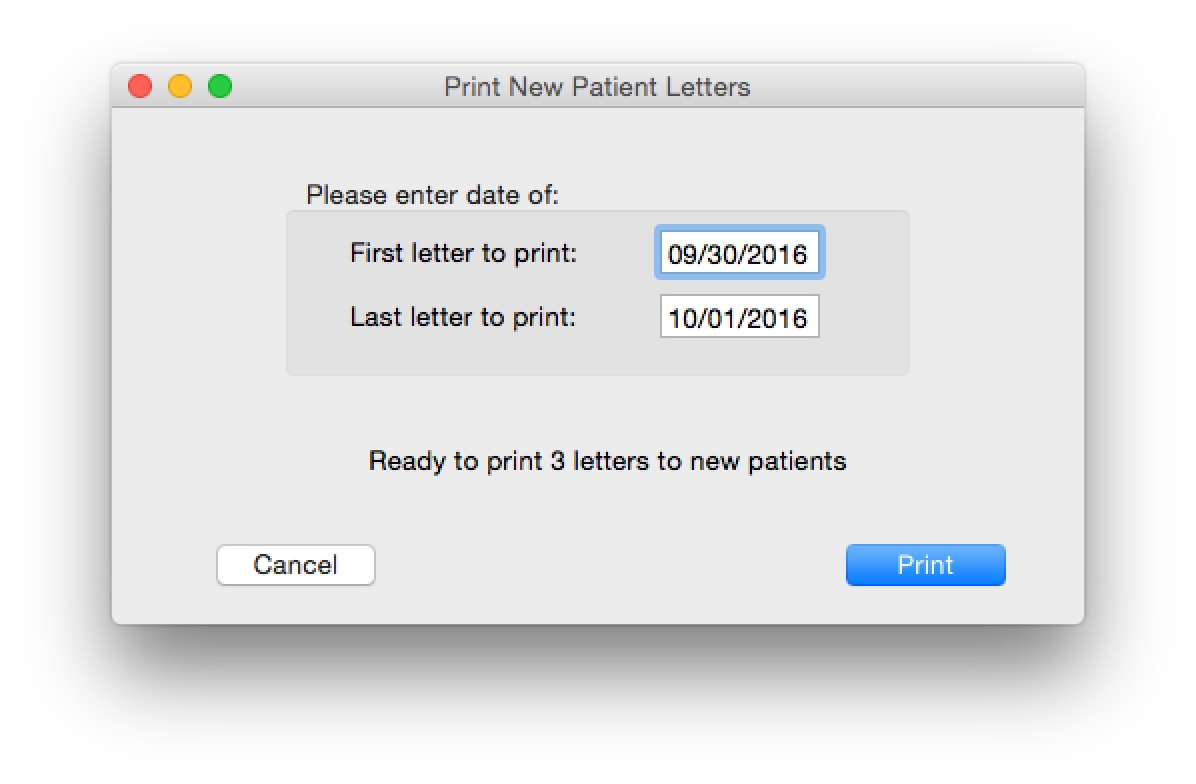
Step 4. Check the Date Range and click the Print button
Now that you are all set up to print automated new patient letters and doctor letters, simply do steps 3 and 4 the next time you are ready to go.
Don’t forget, you can always print a letter for a single patient using the Print Auto Letter from the More menu when viewing the Patient Information screen.
When printing letters to doctors, if an EMR note is found for that patient, it will also print, so you can attach it to the letter.
If you would like a template for a New Patient Letter or a Doctor Letter, just send us an email and I will send you text that you can copy and paste into your letter. You can then modify the letter however you like.

